
Appearance
Managing your workspace and members
This guide walks through Workspace Settings: renaming the workspace on the General tab, then inviting teammates, changing their roles, removing a member and cancelling a pending invitation on the Members tab.
Steps
1. Rename your workspace
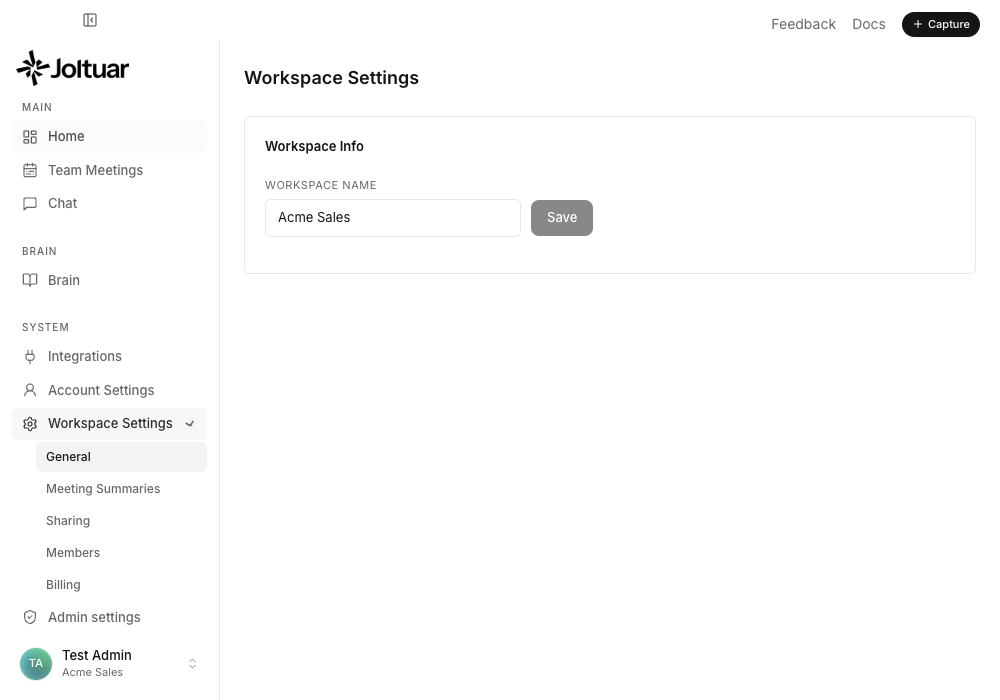
The General tab holds the workspace name. Type a new name and click Save — it updates everywhere, including the switcher at the bottom of the sidebar.
2. See who is in the workspace
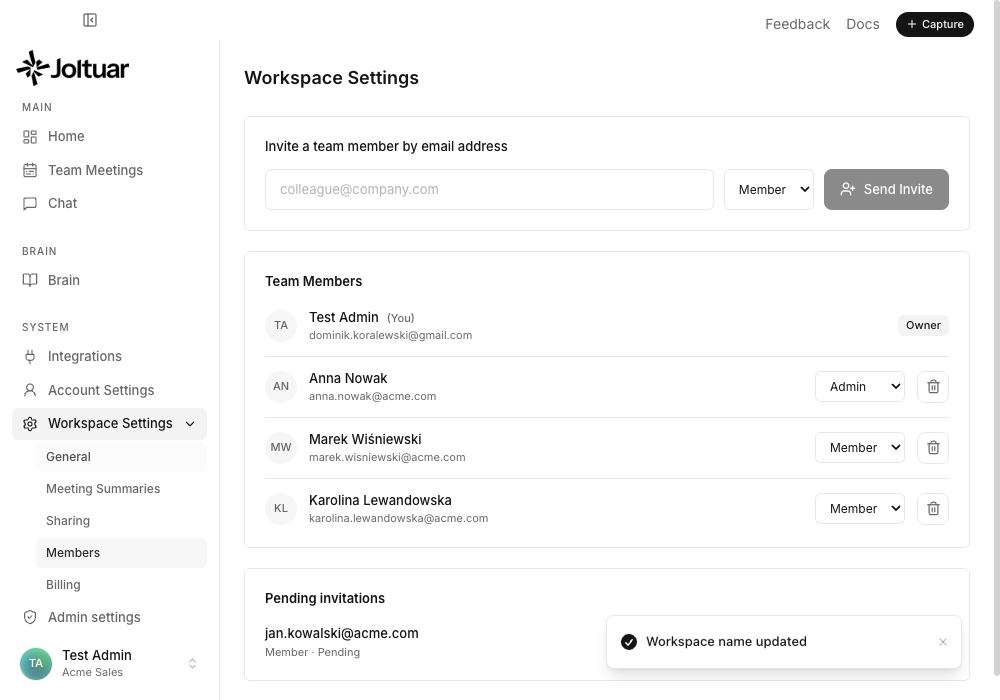
The Members tab lists everyone in the workspace with their role. The owner and your own row are protected — you manage the other members from here.
3. Invite a teammate
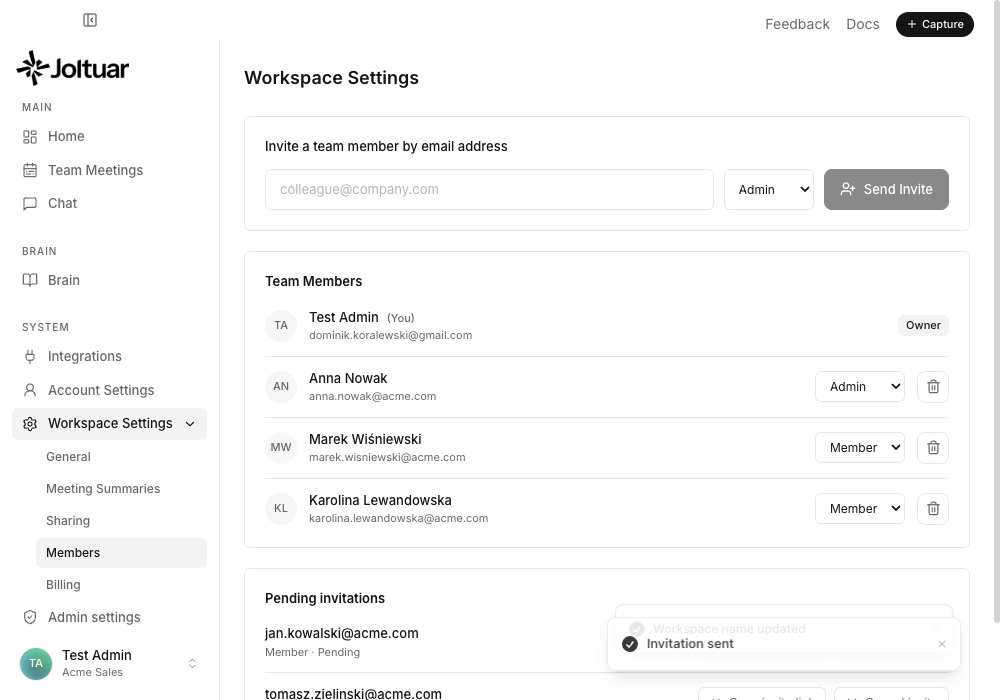
Invite a teammate by email and pick the role they will get. The invitation appears under Pending invitations until they accept it.
4. Change a member's role
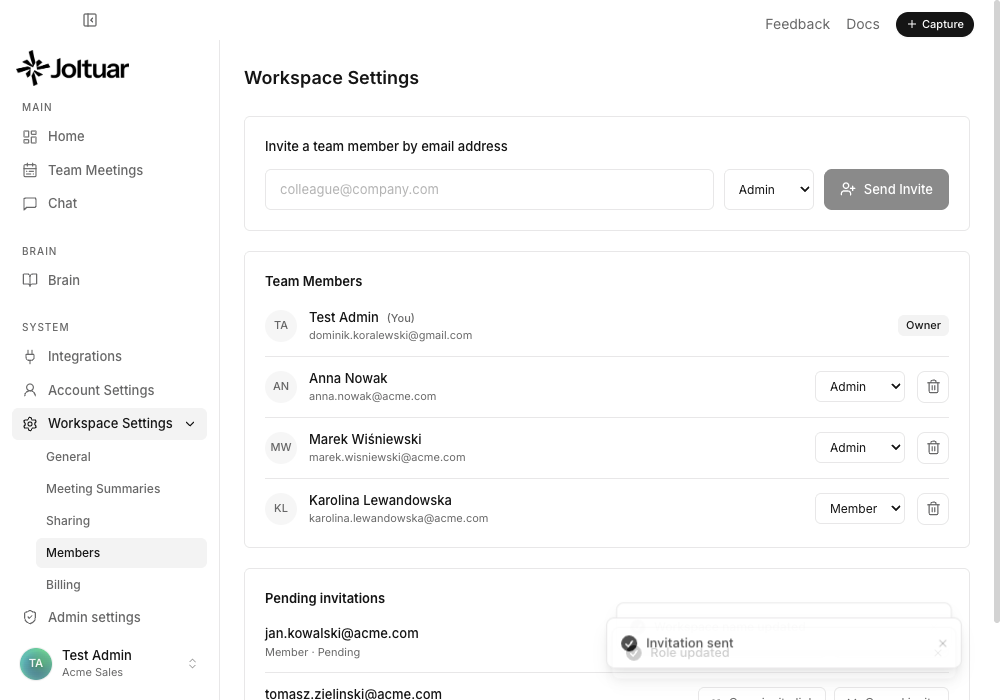
Promote or demote a member with the role dropdown next to their name — the change is saved immediately.
5. Confirm before removing a member
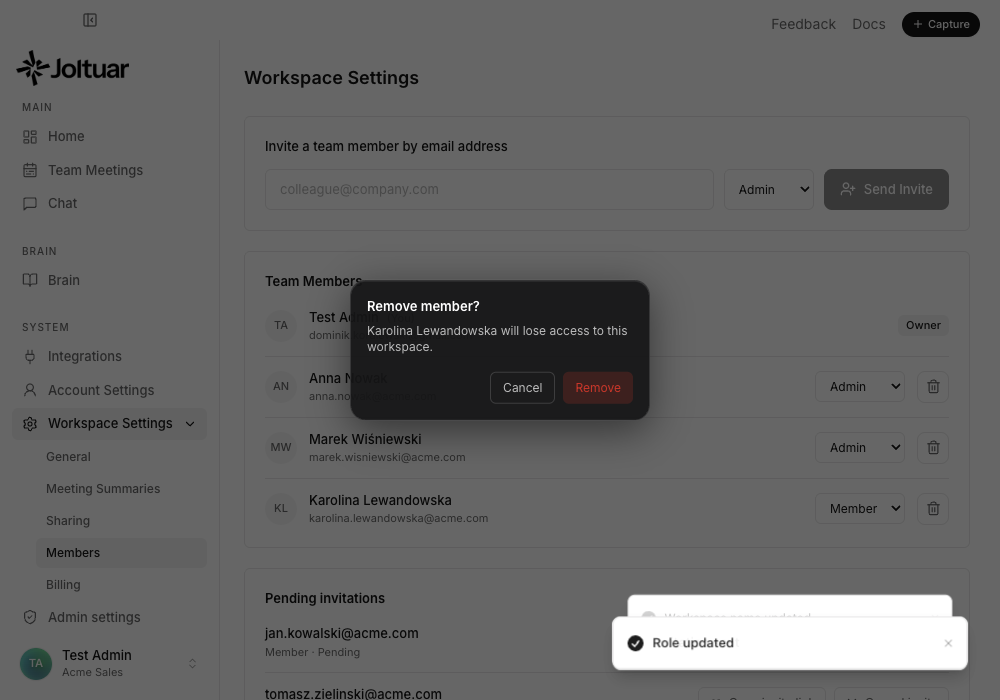
Removing a member asks for confirmation first, so you never drop someone by accident.
6. Remove the member
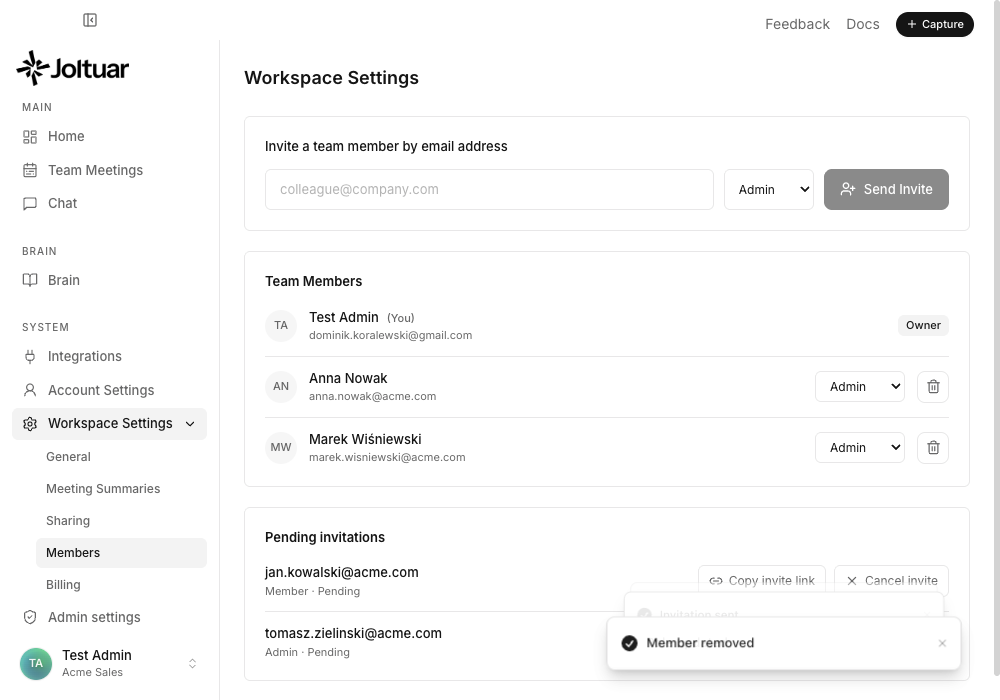
Confirm, and the member loses access to the workspace right away.
7. Copy an invitation link
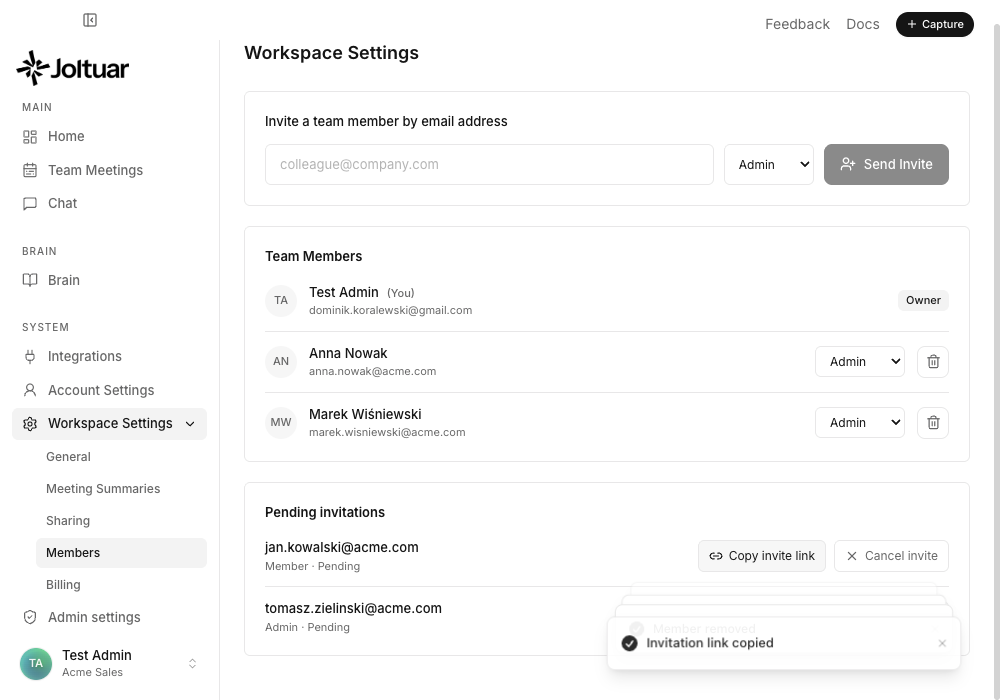
Invitation email did not arrive? Copy the invitation link from the Pending invitations list and send it to your teammate yourself — it is the same link the email carries.
8. Cancel a pending invitation
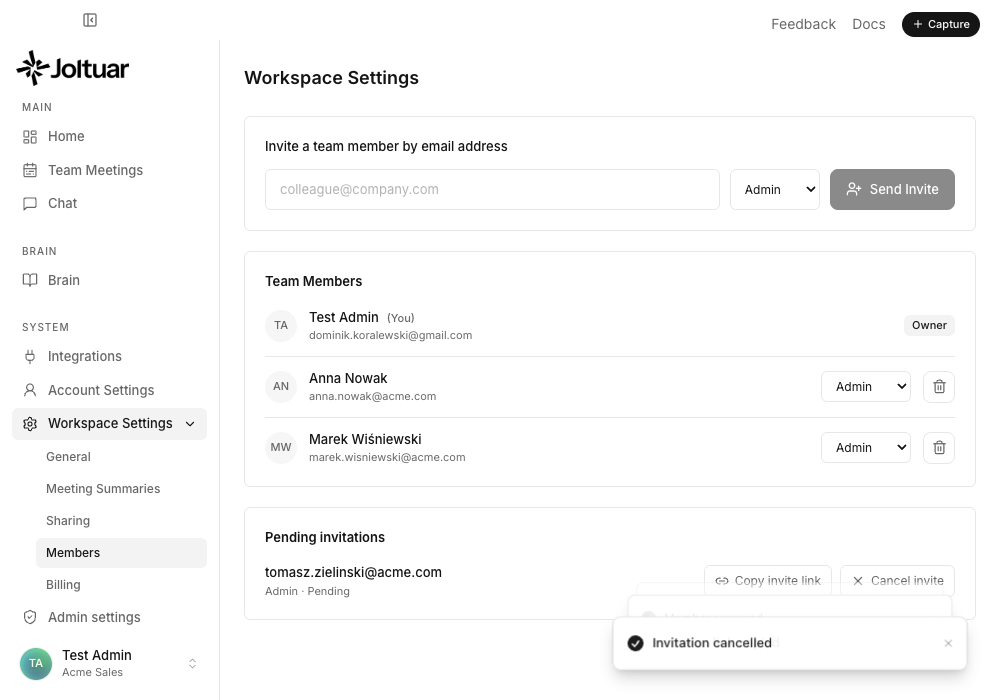
Changed your mind about an invite that has not been accepted yet? Cancel it from the Pending invitations list.